package io.jenkins.plugins.sample;

import hudson.model.Action;

public class HelloWorldAction implements Action {

    @Override
    public String getIconFileName() {
        return null;
    }

    @Override
    public String getDisplayName() {
        return null;
    }

    @Override
    public String getUrlName() {
        return null;
    }
}Extend the Plugin
| While possible to follow with a plain text editor, this section is much easier to follow along by using a Java IDE with Maven support. |
It’s time to extend the sample plugin with new features:
-
Record the name used in the greeting not just in the build log, but a proper data structure.
-
Add a new page to the build that shows the name used in the greeting.
It is important that we store the name that was used when the build was run, rather than use the one in the configuration, as the configuration may change.
Record the name
First, create a class called HelloWorldAction in the same package as HelloWorldBuilder. That class needs to implement Action. Actions are a basic building block for extensibility in Jenkins: They can be attached to many model objects, get stored with them, and optionally add to their UI.
Since we want to store the name used in the greeting, we’ll need to add a field with getter to this class. We’ll also add a constructor that takes the name as argument.
(...)

public class HelloWorldAction implements Action {

    private String name;

    public HelloWorldAction(String name) {
        this.name = name;
    }

    public String getName() {
        return name;
    }

    (...)
Now, we actually need to create an instance of this class when the build step is executed. We need to extend the perform method in the HelloWorldBuilder class to add an instance of the action we created to the build that’s being run:
(...)
    @Override
    public void perform(Run<?, ?> run, FilePath workspace, Launcher launcher, TaskListener listener) throws InterruptedException, IOException {
        run.addAction(new HelloWorldAction(name)); (1)
        if (useFrench) {
            listener.getLogger().println("Bonjour, " + name + "!");
        } else {
            listener.getLogger().println("Hello, " + name + "!");
        }
    }
(...)| 1 | This is the line that was added, everything else can remain as is. |
Save these changes, and run the plugin again using mvn hpi:run.
Whenever changing the Java source code or adding or removing resource files, you will need to restart the Jenkins controller for the changes to take effect. Only some resource files can be edited while Jenkins is running via hpi:run.
|
Now, when running a build with this build step, the action will be added to the build data. We can confirm this by looking at the build.xml file corresponding to the build in the work/jobs/JOBNAME/builds/BUILDNUMBER/ directory.
As we can see, there are two actions in this build:
<build>
  <actions>
    <hudson.model.CauseAction> (1)
      <causes>
        <hudson.model.Cause_-UserIdCause/>
      </causes>
    </hudson.model.CauseAction>
    <io.jenkins.plugins.sample.HelloWorldAction plugin="demo@1.0-SNAPSHOT"> (2)
      <name>Jenkins</name> (3)
    </io.jenkins.plugins.sample.HelloWorldAction>
  </actions>
  (...)
</build>| 1 | Build causes (how the build was triggered) are also stored as actions. In this case, the anonymous user started the build. |
| 2 | This is the action we created, |
| 3 | and this is the name that was used when the build was created. |
Add a view that shows the name
Next, we need to make the action we’re storing with the build visible.
First, we need to go back to the HelloWorldAction and define an icon, title, and URL name:
    @Override
    public String getIconFileName() {
        return "document.png"; (1)
    }

    @Override
    public String getDisplayName() {
        return "Greeting"; (2)
    }

    @Override
    public String getUrlName() {
        return "greeting"; (3)
}| 1 | This is the icon used for the side panel item. document.png is one of the predefined icons bundled with Jenkins. |
| 2 | This is the label used for the side panel item. |
| 3 | This is the URL fragment used for this action. |
With these changes, the action will show in the build’s side panel, and link to the URL \http://JENKINS/job/JOBNAME/BUILDNUMBER/greeting/.

Next, the page appearing at that URL needs to be defined. To create such views in Jenkins, Apache Commons Jelly is typically used. Jelly allows defining XML and XHTML output in XML. It has many features useful for this purpose: It:
-
supports conditions and loops
-
allows inclusion of view fragments defined elsewhere
-
can be used to define reusable UI components
In the directory src/main/resources/io/jenkins/plugins/sample/, we need to create a new directory called HelloWorldAction/.
This directory corresponds to the HelloWorldAction class and contains related resources.
This is a directory in src/main/resources, not src/main/java.
|
We can see that resources related to the build step HelloWorldBuilder are stored in the src/main/resources/io/jenkins/plugins/sample/HelloWorldBuilder/ directory:
config.jelly is the build step configuration form,
the various config*.properties files contain the localizations for the build step configuration
and the help*.html files provide the localized inline help for the configuration.
|
Create a file named index.jelly in src/main/resources/io/jenkins/plugins/sample/HelloWorldAction/.
This will be what gets shown at the \http://JENKINS/job/JOBNAME/BUILDNUMBER/greeting/ URL.
Add the following content:
<?jelly escape-by-default='true'?>
<j:jelly xmlns:j="jelly:core" xmlns:l="/lib/layout" xmlns:st="jelly:stapler">
<l:layout title="Greeting"> (1)
<l:main-panel> (2)
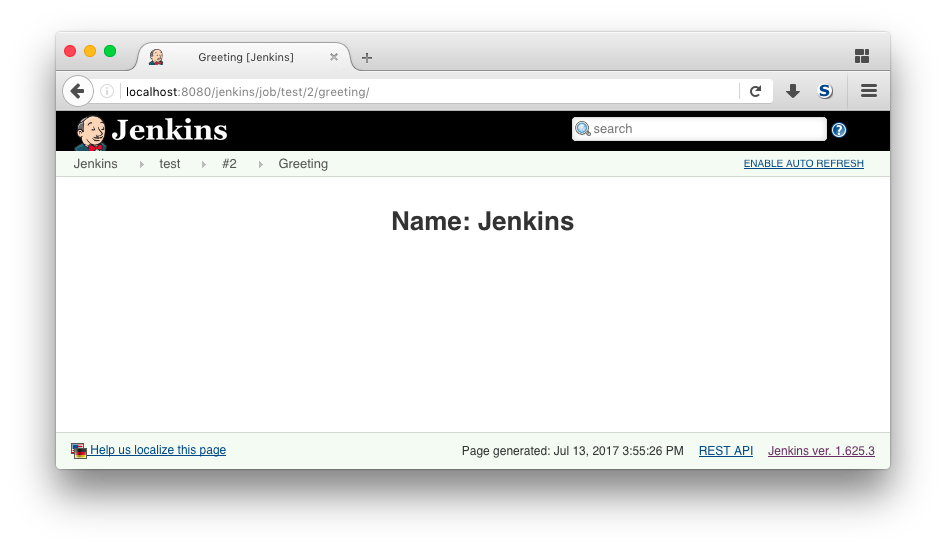
<h1> (3)
Name: ${it.name} (4)
</h1>
</l:main-panel>
</l:layout>
</j:jelly>| 1 | layout is a reusable tag defined in Jenkins core that provides the basic page layout with header, side panel, main content area, and footer. |
| 2 | To make the name show up in the main content area (rather than e.g. the side panel), we need to wrap our output in a main-panel tag. |
| 3 | We can use any HTML tags and they will be used for the output. |
| 4 | This is a JEXL expression. it refers to the Java object the view belongs to (similar to this in Java), in this case the HelloWorldAction instance. it.name is equivalent to a getter call (getName()). |
The resulting page will look similar to this:
Add the side panel for the build to the view
In the output above, there is no side panel. As this view is related to a specific build, that build’s side panel should be shown as well. To do that, we first need to obtain a reference to the corresponding build in our action, and then include the build’s side panel view fragment in the action’s view.
To obtain a reference to the build (or, more generally, the Run) the HelloWorldAction belongs to, we need to change the existing class to make it implement RunAction2.
This interface adds two methods that are called when the run is first attached to a build (onAttached(Run)), and when the action and run are loaded from disk (onLoad(Run)), respectively.
(...)
import hudson.model.Run;
import jenkins.model.RunAction2;

public class HelloWorldAction implements RunAction2 { (1)

    private transient Run run; (2)

    @Override
    public void onAttached(Run<?, ?> run) {
        this.run = run; (3)
    }

    @Override
    public void onLoad(Run<?, ?> run) {
        this.run = run; (4)
    }

    public Run getRun() { (5)
        return run;
    }
(...)| 1 | RunAction2 is the interface to implement so that actions added to Run properly get references to the Run. |
| 2 | The Run is stored in a transient action so this field won’t be serialized to disk with the action. |
| 3 | Setting the field when first attaching this action to the Run. |
| 4 | Setting the field when loading this action from disk. |
| 5 | This will make the Run available for use in the Jelly view — it cannot access private fields. |
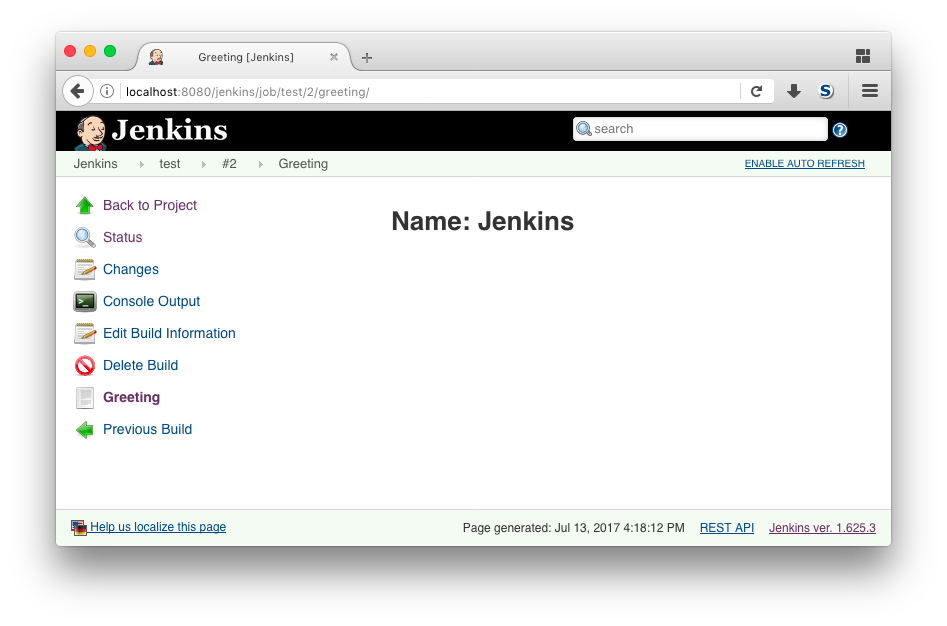
Once this is done, we need to extend the view to include the side panel view fragment of the Run:
(...)
    <l:layout title="Greeting">
        <l:side-panel> (1)
            <st:include page="sidepanel.jelly" it="${it.run}" optional="true" /> (2)
        </l:side-panel>
        <l:main-panel>
          (...)
        </l:main-panel>
    </l:layout>
(...)| 1 | Similar to main-panel, we want the contents to show up only in the side panel, so we need to wrap them in this element. |
| 2 | This includes a view fragment (sidepanel.jelly) of another object (the Run) at this location. We mark this as optional so no error is shown if this view fragment doesn’t exist, as the abstract class Run does not define such a view, only its subclass AbstractBuild. |
With these changes, the view we created properly integrates with the Jenkins UI, appearing no different from built-in pages related to a build:
Congratulations, you’ve successfully created and substantially extended a Jenkins plugin!
Troubleshooting
| Anything not working for you? Ask for help in chat or on the jenkinsci-dev mailing list. |